

Construction
Here are the steps in the process of building a scale model aircraft.
CHOOSING THE MODEL TO BUILD
This is the first step you need to take. When selecting the model you want to build, you should base your decision on the kind of aircraft that interests you, the space available to display it when finished, and your experience as a modeler. Most kit models indicate the skill level required to assemble the model on the box. For example, Revell-Monogram uses a skill level ranging from 1 to 3, with 1 being the easiest to build. If you are constructing one of your first aircraft models, you may want to start by assembling an entry-level kit. They are not only less expensive but also include a fewer number of parts than more advanced kits. Some entry-level kits don’t even require glue because they have parts designed to snap together.
There are many kit manufacturers to choose from. Here is a list of the leading manufacturers of scale model airplanes.
Click here to view the list of manufacturers.
CHOOSING THE SCALE OF YOUR MODEL
What scale do I want my model or collection of models to be? Some modelers prefer to build all their models on one scale. It all depends on the space available to showcase your collection. If you live in a small apartment, maybe a 1:72 scale is a good fit. If you plan to have an extensive collection, perhaps a small scale is also good. On the other hand, if you like the impressive size of large models or the possibility of adding a significant amount of detail to an aircraft, maybe a larger scale like 1:48 or 1:32 is good.
If you want to learn more about scale, click here to download a PDF document that explains what “scale” is all about.
BEFORE YOU START
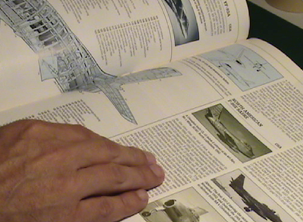
You first want to look for references (photos, diagrams, history, etc.) about the model you plan to build. Next, read the instructions and give special attention to the assembly sequence.
Decide about the color scheme, markings, details, period, and modifications needed to accommodate a special model version. Decide what configuration you want your airplane to have, for example, Landing gear retracted or fully extended, configured with weapons or not, cockpit opened or closed, etc.
List the materials you need: paint, cement, decal setting solution, thinner, and tools. Consider how you want to display your model when finished. You may want to display your model by itself or as part of a larger diorama.
Click here for the video tutorial “Building your first kit from Start to Finish.”
INITIAL ASSEMBLY
You will typically start the assembly of your model by building the interior, focusing on the interior details like the cockpit seat(s), control yoke(s), instrument panels, cargo area, bomb bay compartment, and doors.
Most experienced modelers give special attention to the cockpit details by looking at photographs from the actual airplane and using a magnifying glass to add extensive detail to the instrument panels, dials, and other components inside the cockpit. Some model kits come with decals portraying the details of the instrument panels. Different models have instrument panels carved in plastic. In this case, you can paint the instruments. You can find reference pictures on the internet for the airplane model you are building using a search engine.
CONSTRUCTION, SEAMING, AND SANDING
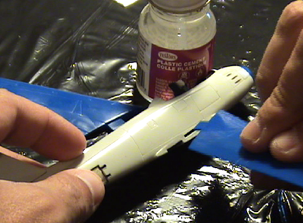
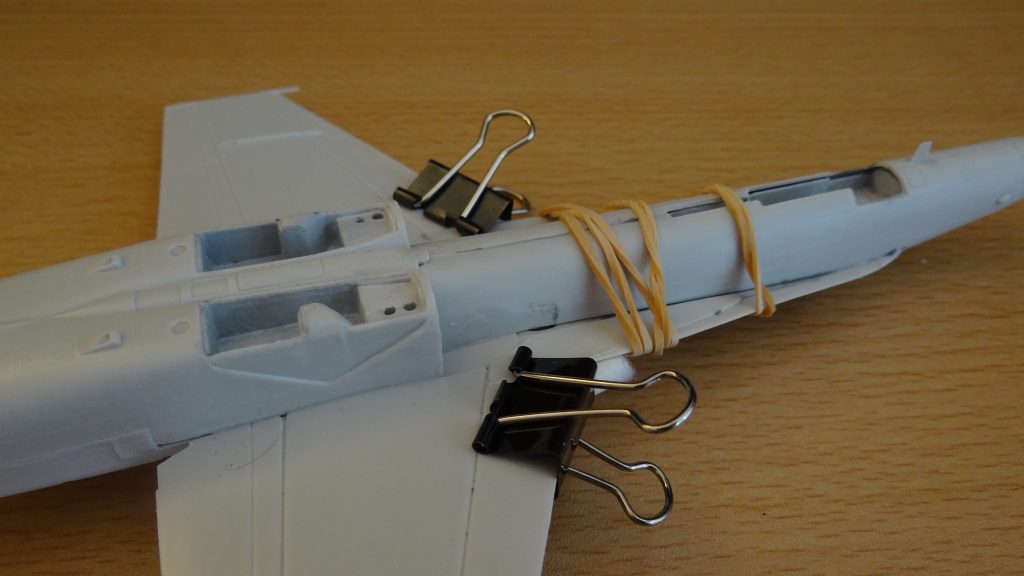
To cut the parts loose from the spruce, use a hobby knife; it is not recommended to break the parts loose because they can get damaged. Large fuselage parts can be glued and temporarily kept together using clamps or rubber bands. Use sandpaper to smooth irregularities on the plastic joints.
If you want a smooth finish, try using wet sandpaper. Look for sandpaper with a high grit number (150 through 300); the higher the grit, the softer the paper, and the finer the finish results. When sanding, you have to be careful not to damage the raised panel lines on the model. You can restore them using a metal scale ruler and a sharp knife if you do. An excellent tool for polishing, fixing irregularities, and making adaptations to a model is the Hand-held miniature drill known as the “Dremel” tool.
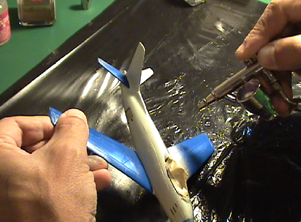
PRIMING AND PAINTING
After seaming and sanding the model, you are ready to prepare it for painting. First, you must apply a coat of primer to reveal any imperfections or gaps on the fuselage. After the problems are fixed, the second coat of primer should be applied to the model. The landing gears, propellers, windscreens, or other small components should be prepared and painted separately before being installed into the model. Remember to always clean the surface before gluing another part to it. The surface must be paint-free before applying glue to have good bonding.
If you plan to add some weathering effects, you can start by adding a coat of silver paint to the front edges of the wings and later use the final paint coat to simulate paint wear.
After painting your model, ensure not to apply a clear lacquer overcoat until you have finished using the decals. A dull coat will prevent the decals from adhering correctly to the surface of your model.
The model can be painted using a brush or an airbrush. Best results come from using the airbrush, the finished surface looks smoother and with fewer imperfections.
If your painting scheme involves camouflage, you can start by outlining the camouflage pattern with a pencil on the model’s surfaces. Then, you will use an airbrush to paint your model following the patterns.
You can also use tape in some painting schemes to separate areas of the fuselage or create patterns.
In painting the clear (transparent) plastic components of the cockpit, it is recommended to use clear tape, cut the surplus tape with a knife, and then apply the paint. You will let the paint dry before removing the tape.
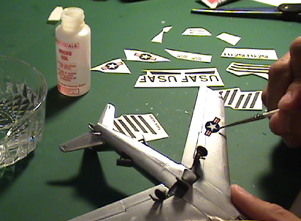
APPLYING DECALS
Most decals are water-activated, fragile, and easily damaged, especially if you do not handle them carefully. A decal setting solution is recommended to help the decal adhere to the model’s surface. Remember that most model surfaces are irregular and contain details. Decals are designed to be applied over smooth surfaces.
If you have used flat paint on your model, spray your entire model with a coat of clear gloss before applying the decals. This coat will smooth out the model’s surface, helping the decals adhere better.
Use a scissor to cut out the decal you will apply first. Dip the decal in water for about 15 to 25 seconds. This time will be, in most cases, enough to let the adhesive release from the backing paper. To ensure the decal is ready, try to slide it with the point of your finger from the backing paper; it should slide easily.
Apply the decal to your model using a small brush to help remove the excess water. Use a piece of tissue to help remove the water from the area around the decal. Clean the thin milky fluid residue around the decal using the piece of tissue.
Brush a light coat of decal setting (solvent) solution while the decal is still wet. Do not use too much solvent because it may disintegrate the decal.
You can also create your decals using a computer, an inkjet printer, and special Inkjet Water-slide Decal Paper. The decals can be designed using an image manipulation program like Gimp (Free/Open Source) or Adobe Photoshop. You can get decal papers from sources such as DecalPaper.com.
Click here to view the Video Tutorial “How to apply decals to a plastic model airplane.”
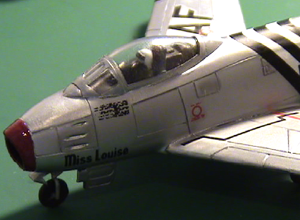
FINISHING YOUR MODEL
After the model is dry and all the decals are applied, verify that everything looks “perfect.”
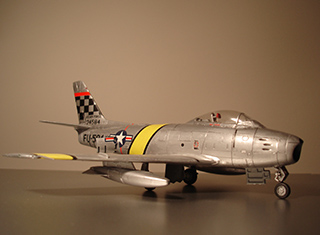
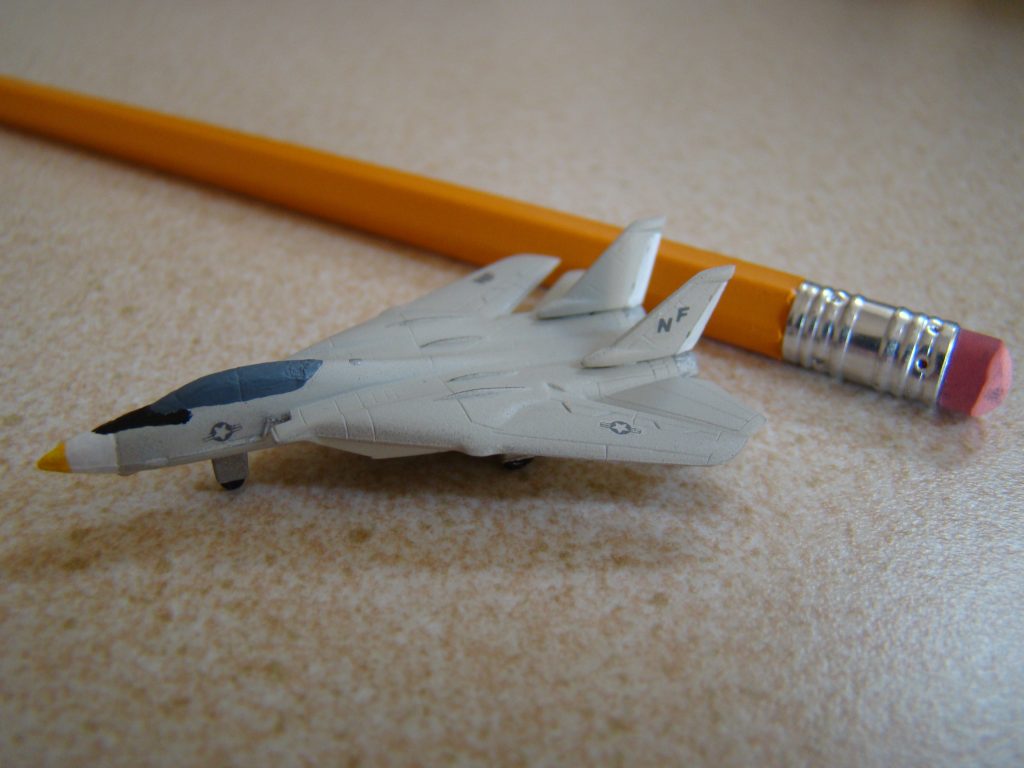
Look at the reference photographs (It is always a good idea to find a photo of the exact configuration of the airplane you are building; try to stay as close as possible to every detail) and instruction diagrams.
Check for any small parts you may have overlooked, and check all the details again.
Now is the time to cover all the clear windows with masking tape and spray a flat or glossy finish coat. Most of the time, one coat will do it. If your model needs another coat, let the first one dry completely before applying another.
TIP: Try not to handle your model until it is dry, or you will leave undesired fingerprints all over it.
ANOTHER TIP: Avoid applying more than two coats of flat finish paint.
When Should I apply flat or glossy finishes? I have this rule: I usually use a flat finish for World War I or II airplanes and glossy for modern airplanes. Remember that many fighter airplanes are simonized to improve aerodynamics.